Wednesday, September 24, 2014

Lonza Taste Testing

Tonight was taste testing time. I cut up the peppered and bay/thyme/juniper lonzas up into 3 pieces each. A piece of each lonza was kept out for near-term consumption while the rest were vacuum packed. Here's what they look like:
Lonza flavored with bay leaf, juniper, thyme and pepper.

Pepper Lonza

Bay/thyme/juniper/pepper Lonza

A delicious plate of both types. Bay on the left, pepper on the right.

Portioned out and sealed for later consumption.
Overall, the flavor wasn't overpowering on either lonza, and interestingly the pepper lonza was the crowd favorite. The salt content may have been slightly on the high side for my tastes, but paired with bread it goes quite well. The texture was the most noticeable thing that engendered comments. The meat was a bit more moist than expected, it wasn't bad, but could have stood an extra few more percentage points of weight loss. In the future 35-40% weight loss may be more desirable than 30%. Also, I noticed that in my setup, I kept the meat in the same orientation with respect to facing front or back of the wine fridge. The side facing the back was exposed to more air flow from the fan and therefore got a bit more dry. The asymmetry was noticeable from a gentle squeeze on the loin before it was cut. It was also somewhat noticeable on the sliced finished product. Rotating sides in the future would be desirable for more even drying. I also felt that the meat would have benefited from a slight bit of cold smoking, so I may attempt that in the near future. Overall, the product was definitely edible and quite delicious, and if/when I make it again, I will know which knobs to turn.

Monday, September 22, 2014

Lonza Results are In – Stay Tuned for Taste Testing

It's been almost 3 weeks since I've started my first cure in this wine fridge setup, and I'm happy to report that the meat has already lost 30% of its water weight with no presence of mold whatsoever! Check out the temperature and weight loss curves over the last 18 days. Not too bad. I am waiting to borrow a foodsaver before I cut into the first lonza. I want to make sure that I vacuum seal it right away since there is no way I can eat nearly 2lbs of cured meat by myself before it starts deteriorating in quality. The plan is to cut them into 3 or so pieces and seal them so that they can be enjoyed over a much longer period without drying out further. I will update shortly with pictures of the meat sliced into and comment on my flavor observations and any insights on what to do better next time.

The final weighing

Temperature and humidity in the wine fridge over the aging period.
Notice how the humidity in the chamber is higher at the beginning? Well, this is for two reasons. 1) On day 1 of the cure I brought 1 cup of water to about 150°F in my water kettle and poured it in a tray at the bottom of the fridge. 2) The meat itself has a lot of moisture that contributes to self humidifying the chamber. The addition of extra humidity at the very beginning of the process is pretty important. Ideally, around 80%RH should be maintained for the first couple of days. If the surfaces of the meat are allowed to dehydrate quickly then the moisture internal to the meat can't diffuse out as quickly. In some extreme cases a crust can form preventing moisture from escaping at all, this is called case hardening. It could cause the meat to rot from the inside, but again, it's only a problem if the humidity is really low, like on the order of 30%RH or lower at the beginning.

Weight loss over time
One thing I noticed is that the pepper lonza dried out much quicker than the bay leaf lonza. This I'm fairly certain is due to it's placement in the fridge. The pepper lonza was towards the back near the fans of the thermoelectric cooler, while the bay lonza was in the front near the door.


Thursday, September 4, 2014

Lonza Cured Two Ways

Lonza is a fancy Italian word for cured loin. Of course, we are talking about pork here. The diminutive Lonzino would be a narrower cured tenderloin, and Lomo is the Spanish version of the same thing, typically slathered in paprika. Curing whole muscles is the easiest way to get into dry curing, several of my first attempts were with Bresola, a beefy facsimile made with eye of round. Lean cuts are less finicky than their fatty (Coppa) or ground up (Salami) counterparts. The extra fat in those preparations, although delicious, can go rancid quickly if not tended to by expert finesse.

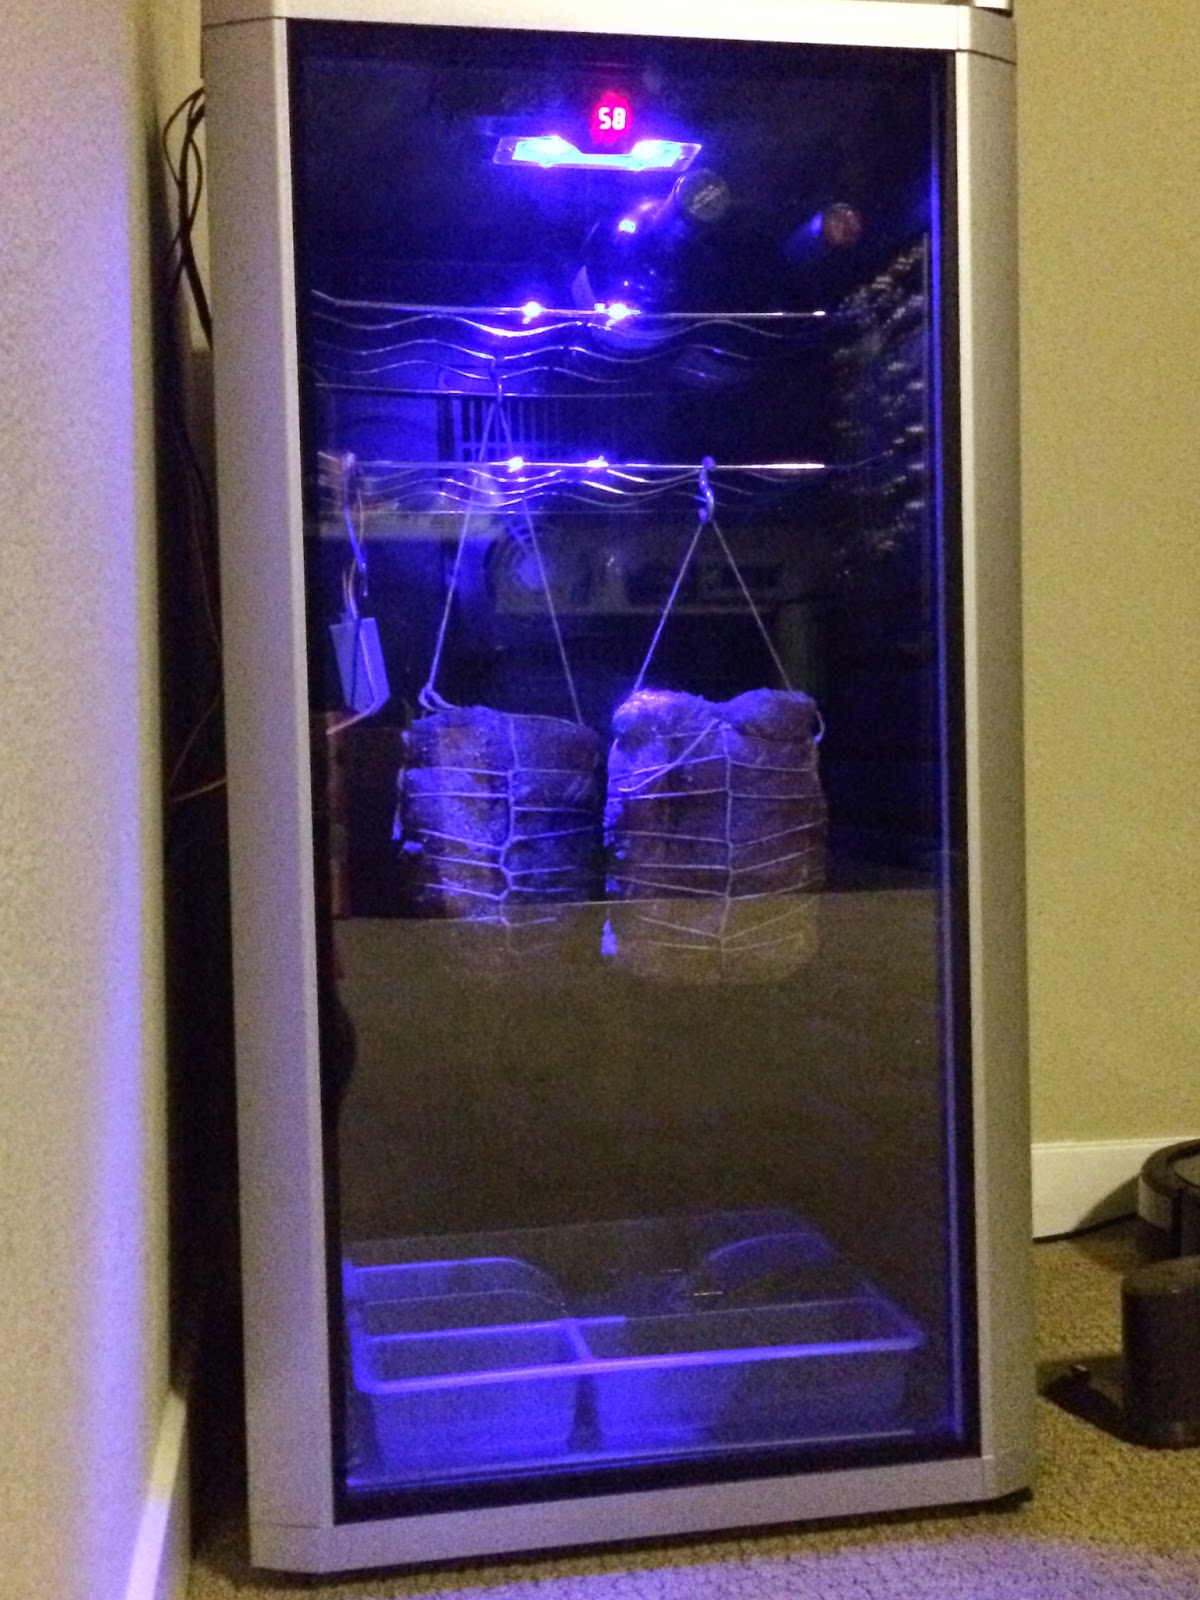
I've acquired a new curing chamber and this is my first go with it. It's a 32 bottle wine cooler that I bought new off of eBay for $170 shipped. I also bought this humidity monitor which was about $26. So the total cost to play was under $200. Not bad. I deliberated for a long time whether to go with a traditional fridge with a compressor, or a wine fridge with a thermoelectric cooler. Conventional wisdom says that normal refrigerators are better because they run dry, and it's easy to add humidity with a humidifier and controller. With a thermoelectric based fridge, the internal humidity is fairly dependent on the ambient humidity, and it's harder to remove humidity from the ambient environment, or the small wine cooler. In any case, I decided to forge ahead, figuring I could monitor and make manual adjustments as needed for the time being. So far, my humidity sensor has read 60%RH ±2% every single day inside of the wine cooler. I am thrilled with this stability.

I purchased my pork from an Italian grocery store named Piazza's Fine Foods. I purchased a rather large 5 pound loin that I decided I would portion it into two pieces and make two different flavors. My recipes and inspiration came from Michael Ruhlman's great Salumi book. I made the Peppered Lonza, and I applied one of the Coppa recipe's spice mixtures (bay leaf, juniper and thyme) to the other lonza. I heavily salted each piece and added toasted and ground black pepper to the bag in which they would cure for a little over a day. The salt-box method says that the cure should be applied for 1 day per 2 pounds. Since my pieces were 2.5lbs, I went for a day and a half. 36 hours to be exact. The pieces were weighed down with a cookie sheet and weights comprised of whatever else was in the fridge. The pieces were flipped at the 22 hour mark.

Once removed from the cure, the pieces were rinsed and patted dry, then rubbed with red wine. Another coating of their spices was applied before tying. Pepper for one, and juniper, bay leaf, thyme and pepper for the other. The spices were ground as fine as possible. They were then weighed and placed into the curing chamber where the conditions would be checked on everyday, and the pieces inspected for mold. The aging should take 3-4 weeks, for the final product to lose 30% of its original weight. Stay tuned and I will update the progress of how this turns out.


Wednesday, September 3, 2014

Let the Food Blogging Journey Begin!

It's time. I'm ready. I've been creating wonderfully delicious foodie bits over the last decade, and I've privately squirreled away my notes on ingredients, techniques and outcomes. I want to share those things with the world because I've learned so incredibly much from other peoples' blogs. I've also travelled a lot and have been influenced by dozens of cultures and philosophies.

It's my turn to give back. I may cover the culinary gamut here, or I may end up focusing on a particular genre. I may dig up my old notes, or only discuss my new food makings. I don't know how this will turn out, but for starters this space will cover my foray into mostly old-world methods and foods including but not limited to brewing beer, making wine, curing meats, making cheese, bread and other fermentations, cocktail recipes as well of course as just delicious foods that I enjoy or are particularly experimental.

I hope you follow along and share your similar attempts with me.

Enjoy!